Learn how to easily make ebooks with Jutoh
and receive 10% off Jutoh coupon
Jutoh can turn your Microsoft Word .docx file into an ePub or .mobi file. Even better, it’s super easy. Read on to learn how to make ebooks!
The coupon for 10% off of Jutoh or Jutoh Plus is located at the end of this tutorial. *Note: If you purchase Jutoh through the links on this page, Self Publishing Nerd will earn a commission from the sale.
Make sure your Microsoft Word .docx file is formatted correctly for ebook format. My book, Book Formatting for Self Publishers, explains in detail how to do this. Editions are available for both the PC and the Mac. For information about these books, you can also go here:
Book Formatting for Self Publishers: A Comprehensive How-To Guide
Alternately, Smashwords has an excellent ebook that explains how to format your Microsoft Word document so it is ready to be made into ebook format:
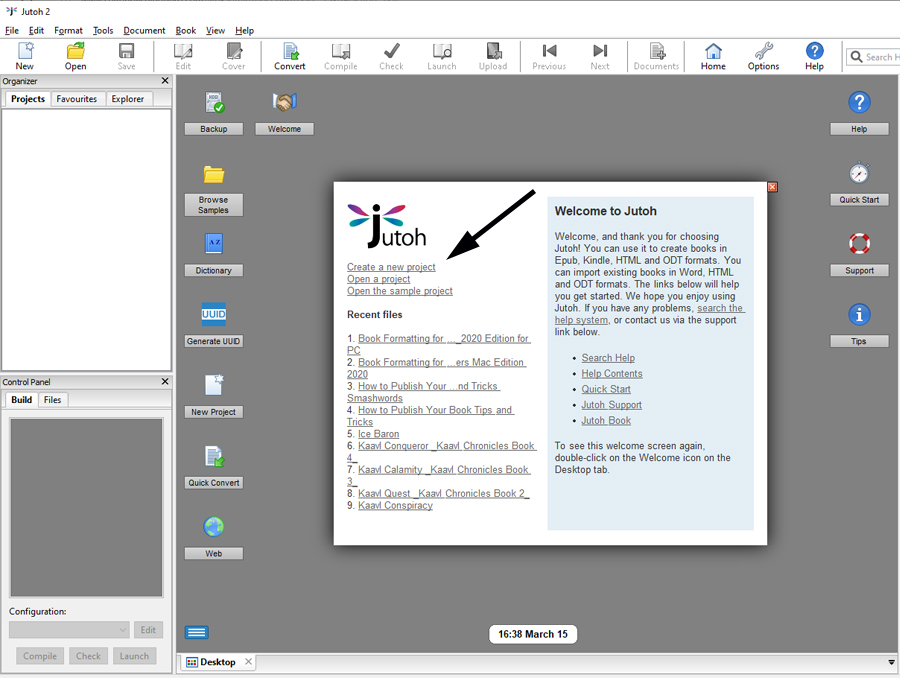
Let’s get started. First, open Jutoh and click on “Create a new project.”
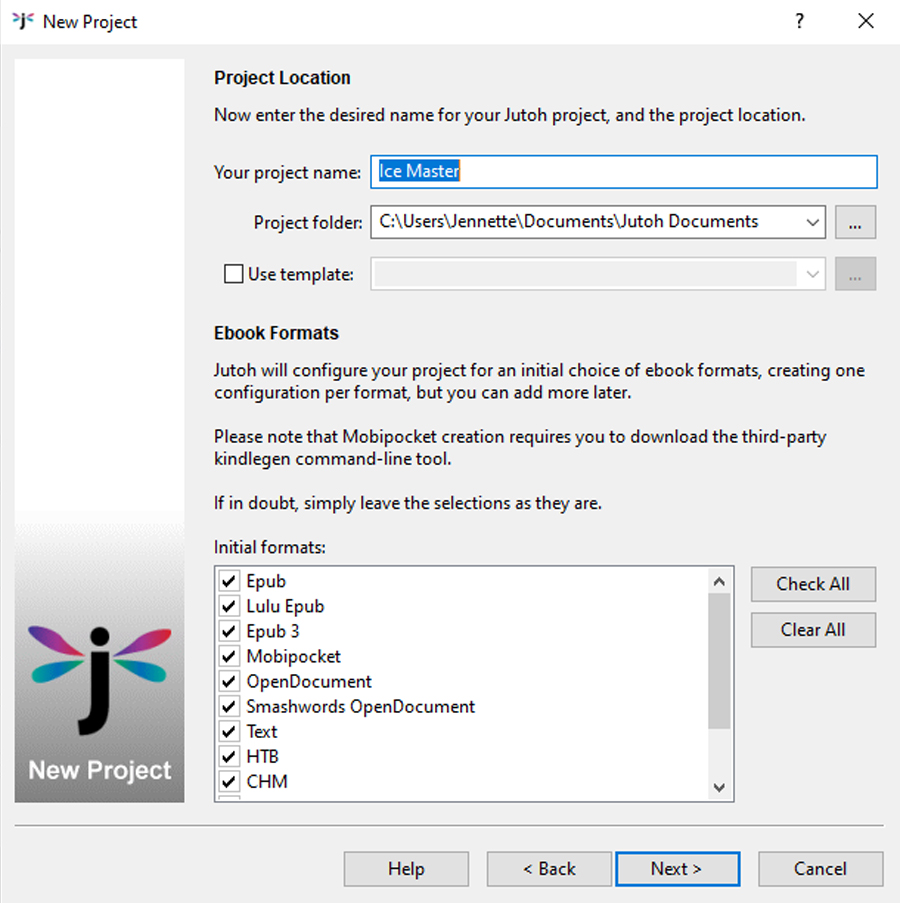
Fill in the metadata in the New Project dialogue box, and then click “Next.”

You should not need to change anything in the next screen. Click “Next.”
Make sure that “Normal reflowable text” is selected. Click “Next.”

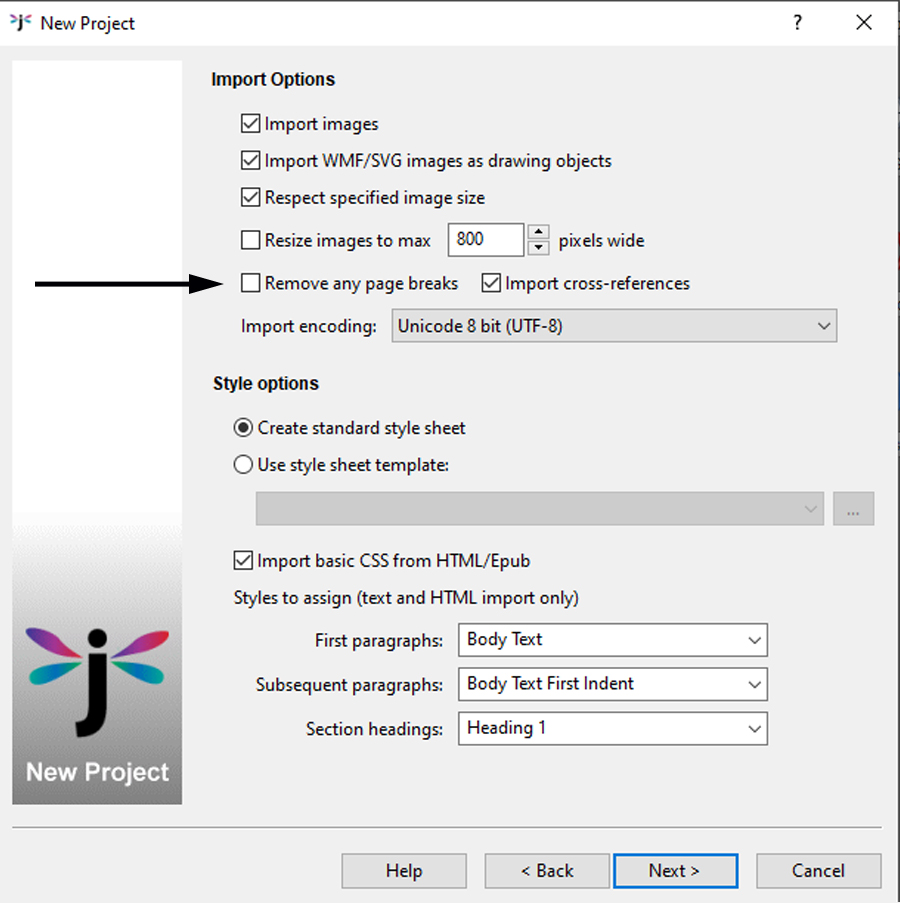
You may want to leave “Remove any page breaks” unchecked. I leave page breaks after my title page, copyright page, and other front matter pages. If I leave this box unchecked, Jutoh will automatically separate them into different pages in your final ebook, which is what you want to happen. (Chapter and section divisions will be covered soon–page breaks are not used to separate these into different pages.) Don’t worry about the three boxes at the bottom of this dialogue box. Click “Next.”
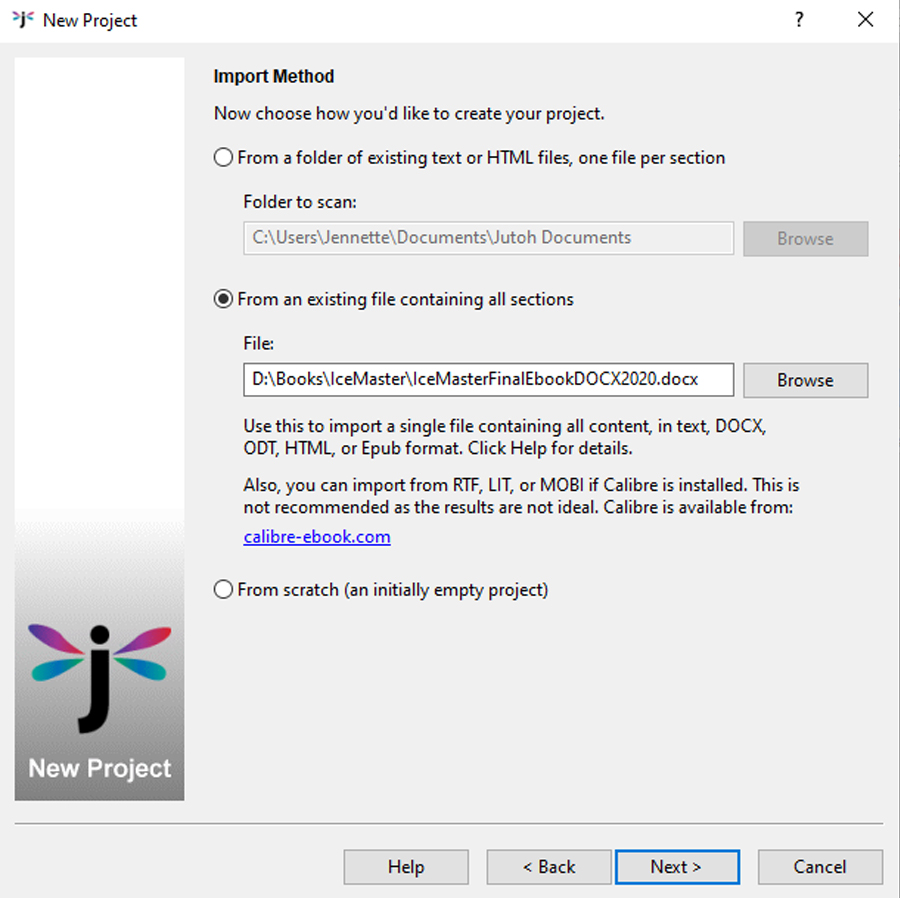
Select the box entitled, “From an existing file containing all sections.” It will prompt you to upload a file. Search for your .docx file for your book manuscript. Click “Next.” It will upload your file.
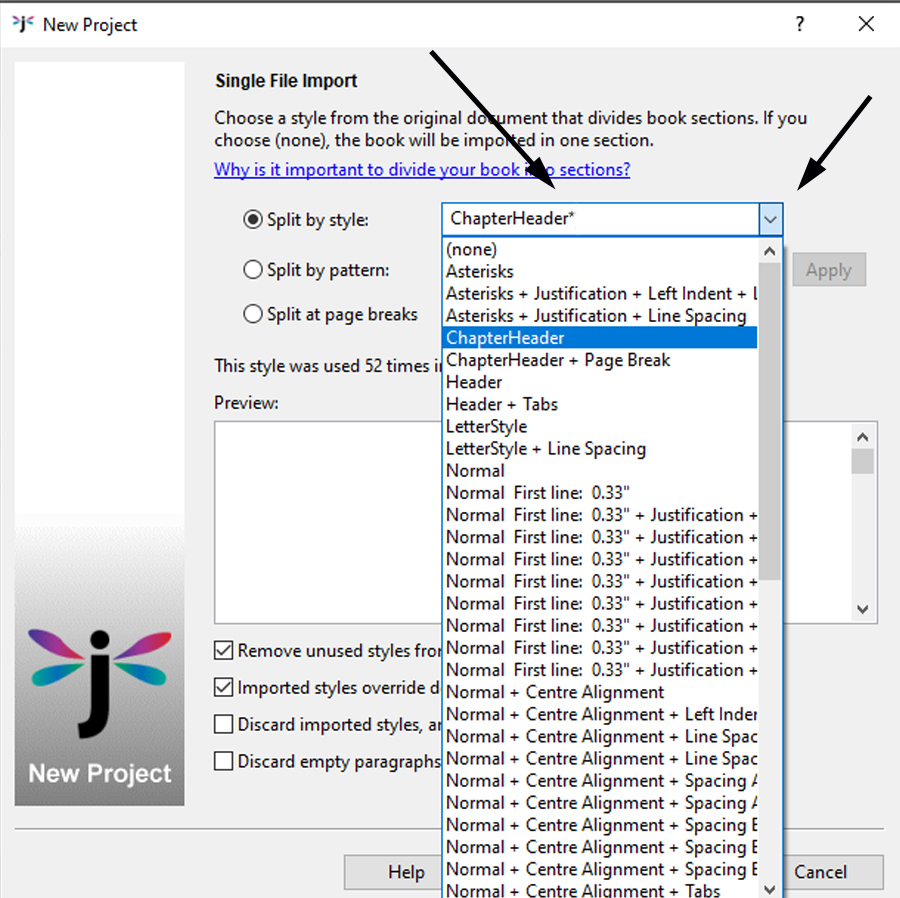
Select “Split by style,” and click the down arrow button to find the style you used for your chapter headers. In this book I used “ChapterHeader.” Note that I placed an asterisk after ChapterHeader*. This will ensure that all instances of ChapterHeader are included when Jutoh splits the document into different pages. For example, if you look at the drop down box, you’ll see “ChapterHeader + Page Break.” Jutoh will split this into a new page, as well.
If you need to split your document into multiple sections, and you’ve used the styles “Header 1” and “Header 2” then you would type (without quotes) “Heading 1*|Heading 2*|” into the box. If you’d like to separate it by three headings, and you used Heading 1, 2, 3, then you would type “Heading 1*|Heading 2*|Heading 3*|” into the box. Hit return, and it should show you how many instances of the heading(s) are in your manuscript. Click “Next.”
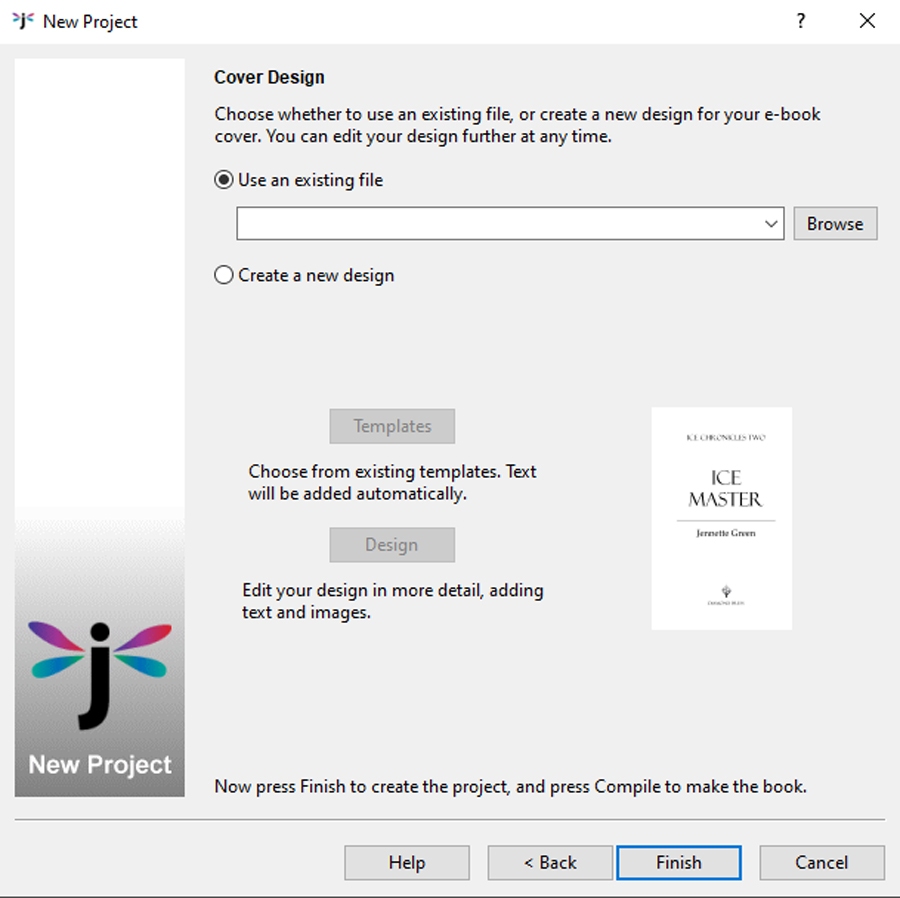
For Cover Design, select “Use an existing file.” Browse for your ebook front cover and upload it. I make sure my file meets KDP’s requirements–their ideal cover size is 2,560 x 1,600 pixels. After you do this, click “Finish.”
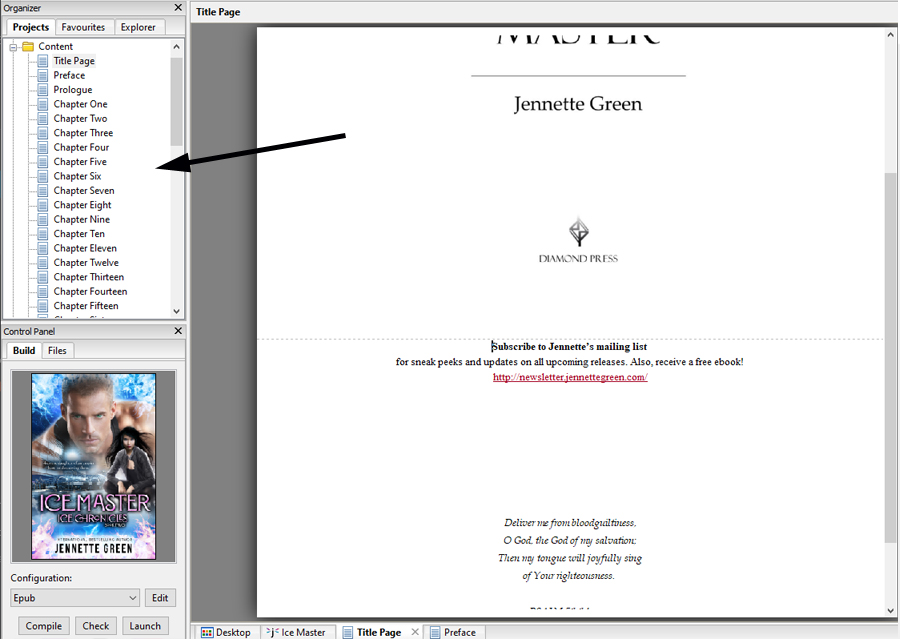
Jutoh will upload your manuscript and split it into sections. Each section will be an entry in the Table of Contents that Jutoh will create and insert into the beginning of your ebook. It will also use each entry to create a NCX Table of Contents, which readers can access at any point within the book so they can easily navigate to a different sections of your book.
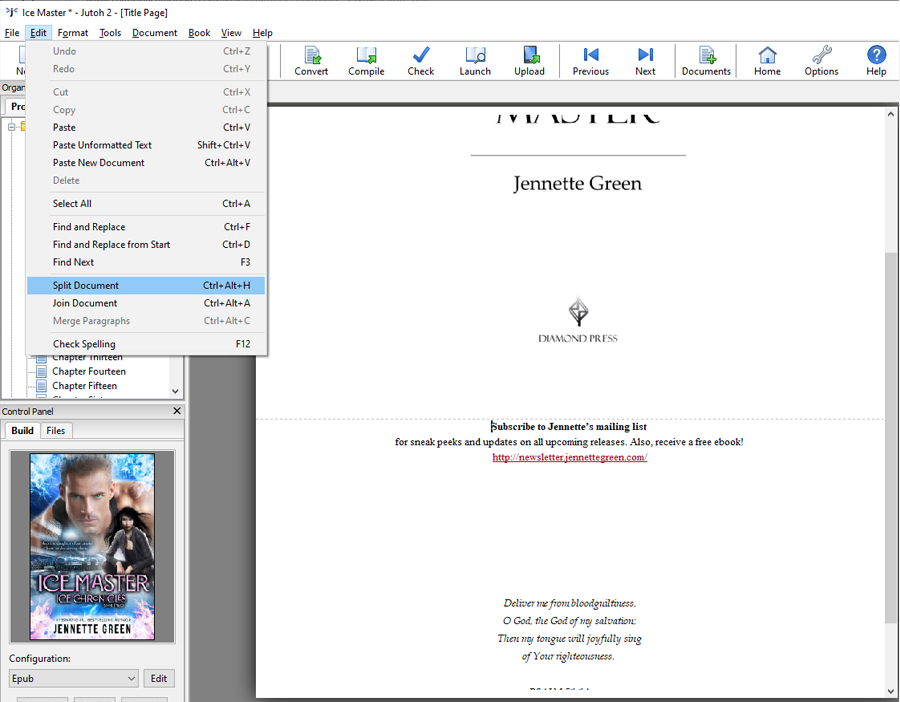
If you’d like to split one page into two pages, place your cursor where you’d like the split to take place. To split it you can either press (without quotes) “Alt + Ctrl + H” or else go to the top menu and click “Edit” and then “Split Document.” (Alternately, if you’d like to join two pages you can select “Edit” and then “Join Document.”)
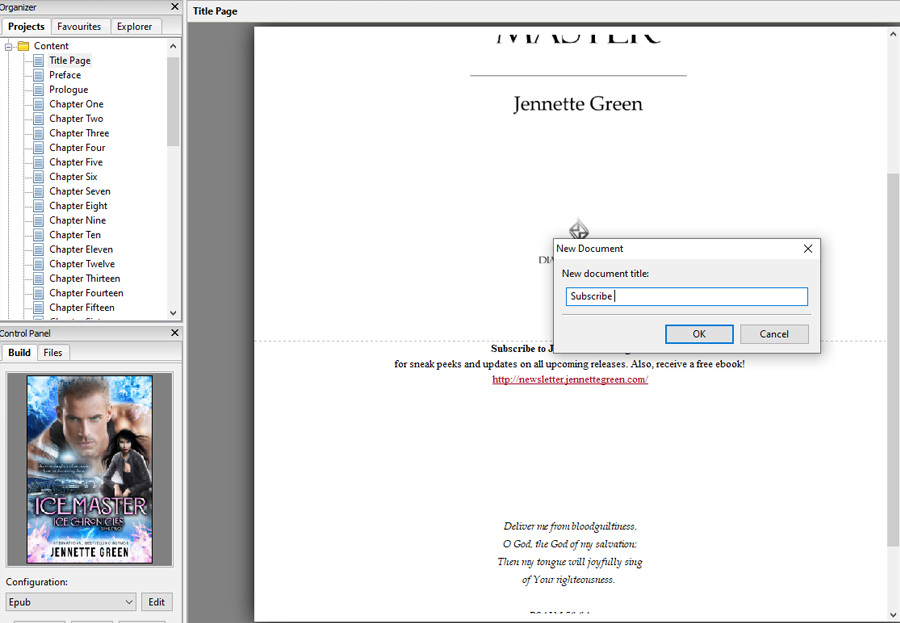
A dialogue box will appear. Type what you’d like the new page to be named.
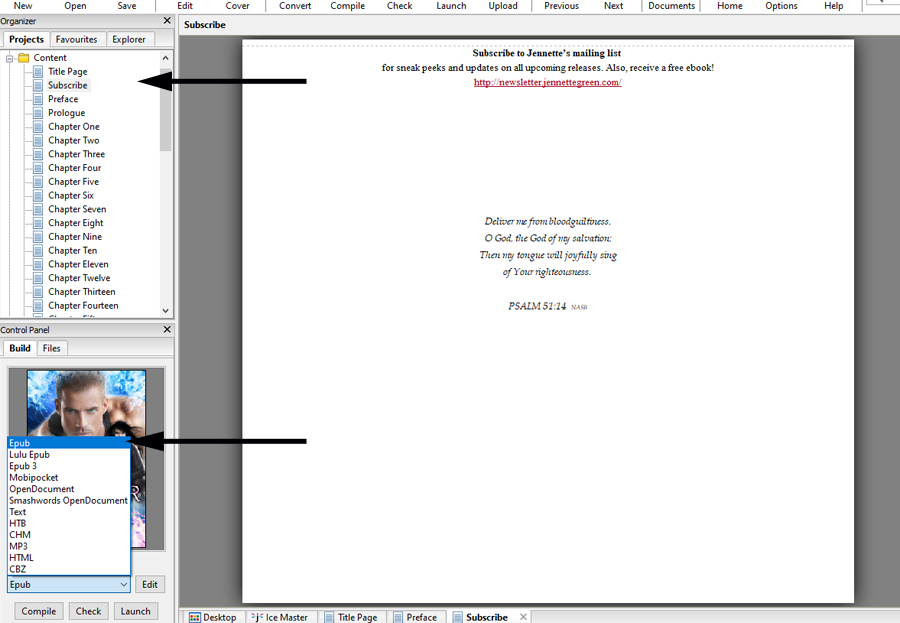
You’ll see the new page in the left panel. Now you just need to go to the bottom left and select the type of ebook you’d like to create. In this example I chose ePub. But I also like to create a Mobipocket file for KDP Kindle. Click “Compile.” Jutoh will create your ebook, and usually it will be located within your Documents folder, in a folder entitled, “Jutoh Documents.”
Jutoh may give you several warnings. Pay attention to these and decide if you’d like to fix them in your Word document and upload it again. If you want to reupload your document without having to create a new file in Jutoh all over again, go to “File” and the “Reimport Project.” If you’ve split pages manually, you’ll need to do so again.
It’s very important to check your files in a previewer before you upload your file to KDP or Barnes & Noble.
Download the Kindle Previewer here:
https://www.amazon.com/gp/feature.html?ie=UTF8&docId=1003018611
Download the Barnes & Noble Nook reading app here:
https://nook.barnesandnoble.com/u/nook-reading-app/379003593
And that’s all there is to it! Pretty simple, right? 🙂
I use Jutoh in my workflow every time I make ebooks. I highly recommend it. If you’d like to find out more about Jutoh’s software, visit
If you’d like to purchase Jutoh, and receive 10% off of the retail price, visit one of the following links in order to purchase either Jutoh or Jutoh Plus. (I use Jutoh (not Jutoh Plus). It’s all I need, and it may be all you need, too.)
Use this discount code to receive 10% off the retail price of Jutoh: DEC6B40794
I hope this tutorial about how to use Jutoh to make ePub and .mobi file ebooks has been helpful. I wish you much success and many books sales. 🙂